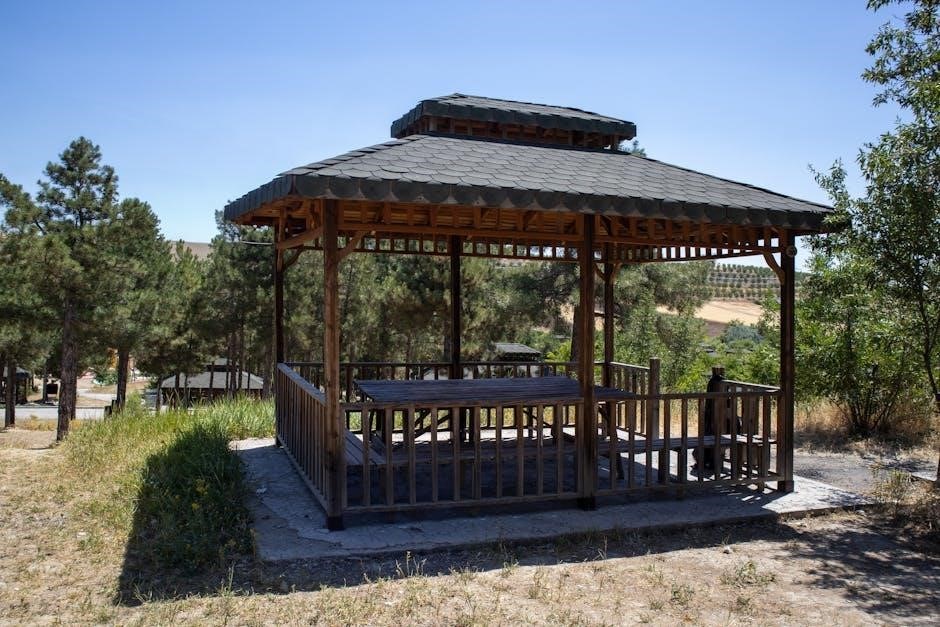
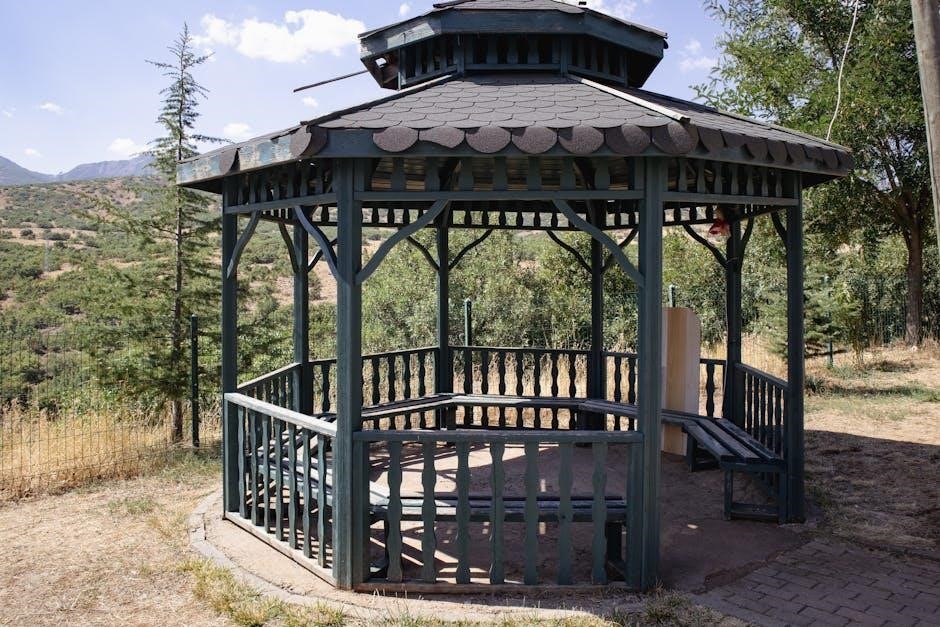
Embarking on the assembly of your 10×10 gazebo promises a delightful outdoor retreat‚ but success hinges on a meticulous approach and careful adherence to provided guidelines․
This comprehensive guide streamlines the process‚ offering detailed diagrams and illustrations for clarity‚ ensuring a smooth and enjoyable installation experience for all skill levels․
Prior to commencing‚ familiarize yourself with the instruction manual‚ as it contains vital safety information and step-by-step procedures for a structurally sound and aesthetically pleasing gazebo․
Importance of Following Instructions
Diligent adherence to the provided assembly instructions is paramount for a safe‚ structurally sound‚ and aesthetically pleasing 10×10 gazebo․ Deviating from the outlined steps can compromise the gazebo’s integrity‚ potentially leading to instability‚ damage‚ or even collapse․
The manual meticulously details each stage‚ from foundation preparation to final bolt tightening‚ ensuring proper alignment and secure connections․ Ignoring these guidelines risks misaligned components‚ insufficient support‚ and a compromised finished product․
Furthermore‚ the instructions incorporate crucial safety precautions designed to protect you during the assembly process․ These warnings address potential hazards and provide guidance on safe handling of tools and materials․ Skipping steps or disregarding safety advice could result in personal injury․
Ultimately‚ following the instructions guarantees a hassle-free assembly‚ maximizing the longevity and enjoyment of your outdoor haven․ A properly assembled gazebo‚ built according to the manual‚ will provide years of relaxation and shelter․
Safety Precautions During Assembly
Prioritizing safety during your 10×10 gazebo assembly is crucial to prevent injuries and ensure a smooth process․ Always wear appropriate personal protective equipment (PPE)‚ including safety glasses to shield your eyes from debris and work gloves to protect your hands․
Exercise caution when handling tools‚ ensuring they are in good working condition and used according to manufacturer instructions․ Avoid overexertion and take frequent breaks to prevent fatigue‚ which can lead to accidents․
When lifting heavy components‚ employ proper lifting techniques – bend your knees‚ keep your back straight‚ and ask for assistance if needed․ Be mindful of your surroundings‚ ensuring a clear and stable workspace free from obstructions․
Inspect all parts for damage before assembly and report any issues immediately․ Never attempt to modify components or force connections․ Adhering to these precautions will contribute to a safe and successful gazebo installation․

Parts List and Inventory
Begin by meticulously identifying all components listed in the manual‚ carefully cross-referencing each item with the provided parts list for accurate inventory․
Confirming all pieces are present before starting prevents frustrating delays during the 10×10 gazebo construction process․
Identifying All Components
Before you begin the actual assembly‚ a thorough identification of all components is absolutely crucial for a smooth and efficient process․ Lay out all the parts in a spacious‚ well-lit area‚ and carefully compare them against the detailed parts list included in your instruction manual․
The manual will typically feature diagrams illustrating each component‚ such as the steel support posts‚ side rails‚ roof panels (often labeled for specific positions)‚ various bolts‚ screws‚ and connectors․ Pay close attention to the different sizes and shapes of hardware; misidentifying a screw or bolt can lead to assembly errors later on․
Specifically‚ identify the aluminum roof sections‚ noting any pre-drilled holes or specific markings․ Separate the hardware into labeled containers to avoid confusion․ Double-check for any smaller‚ easily overlooked parts like washers or end caps․ Accurate component identification sets the foundation for a successful 10×10 gazebo build․
Checking for Missing Parts
After meticulously identifying each component‚ the next critical step is verifying that all parts listed in the instruction manual are actually present․ This proactive check prevents frustrating delays mid-assembly and ensures structural integrity․
Systematically compare the physical parts laid out before you with the parts list‚ ticking off each item as you confirm its presence․ Pay particular attention to the quantity of each bolt‚ screw‚ and connector‚ as these are often the first items to be shorted․
If any parts are missing‚ do not attempt to substitute them with alternatives․ Contact the retailer or manufacturer immediately‚ providing the part number and a description․ Attempting to proceed with missing components compromises the gazebo’s stability and may void any warranty․ A complete inventory is paramount for a safe and successful build․

Foundation Preparation
Establishing a solid‚ level foundation is crucial for gazebo stability and longevity; site selection and base preparation are paramount for success․
Ensure the chosen location is adequately prepared with a level surface‚ utilizing concrete or pavers for optimal support and lasting enjoyment․
Site Selection and Leveling
Careful site selection is the cornerstone of a successful gazebo installation‚ directly impacting its stability and longevity․ Choose a location that is relatively flat and free from obstructions like tree roots‚ underground utilities‚ or overhanging branches․
Prior to any construction‚ meticulously level the chosen area․ This often involves removing sod and excavating to create a uniform base․ Utilize a spirit level and consider employing tools like a laser level for enhanced accuracy‚ especially over larger areas․
Minor slopes can be addressed with fill material‚ compacted thoroughly to prevent settling․ Significant inclines may necessitate more extensive grading or the construction of a stepped foundation․ Remember‚ a perfectly level base is not merely aesthetic; it’s fundamental to the structural integrity of your 10×10 gazebo‚ preventing wobbling and ensuring proper roof alignment․
Always double-check your leveling work before proceeding to the next stage of assembly‚ as correcting an uneven foundation later can be significantly more challenging․
Preparing a Base (Concrete‚ Pavers‚ etc․)
Once the site is leveled‚ establishing a solid base is crucial for your gazebo’s stability․ Several options exist‚ each with its own advantages․ A concrete slab provides the most durable and permanent foundation‚ requiring formwork‚ pouring‚ and curing – a more involved process․
Alternatively‚ a gravel base‚ contained by a perimeter of landscape timbers or paving stones‚ offers good drainage and is easier to install․ Pavers‚ laid on a compacted gravel and sand base‚ present an attractive and relatively simple solution‚ though potentially less stable than concrete․
Regardless of the chosen material‚ ensure the base extends beyond the gazebo’s footprint to provide adequate support․ Proper compaction is paramount; use a plate compactor for gravel or sand bases․ Verify the base remains level throughout the preparation process‚ as this will directly impact the final gazebo structure․
Consider local building codes and regulations regarding permanent structures like gazebos before finalizing your base selection․
Frame Assembly ‒ Step-by-Step
Begin by carefully laying out and securing the steel support posts‚ referencing the manual’s diagrams for correct orientation and alignment during this crucial phase․
Assembling the Support Posts
Initiate the gazebo construction by meticulously assembling the support posts‚ a foundational step demanding precision and adherence to the provided manual’s guidance․
Carefully unpack each post component‚ identifying them based on the parts list to ensure correct assembly; typically‚ these involve connecting vertical sections using bolts and screws․
Ensure each connection is snug but not fully tightened at this stage‚ allowing for adjustments during the frame alignment process – this flexibility is paramount․
Pay close attention to any pre-drilled holes or markings‚ as these dictate the correct orientation and positioning of each post segment․
Once all posts are initially assembled‚ stand them upright and temporarily brace them to maintain stability before proceeding to connect the side rails․
Double-check the vertical alignment of each post using a level‚ making minor adjustments as needed to guarantee a plumb and stable structure․

Connecting the Side Rails
With the support posts assembled and temporarily braced‚ the next crucial step involves connecting the side rails to form the gazebo’s perimeter frame․
Carefully align the side rails between the posts‚ ensuring they are flush and level; typically‚ these connect using bolts‚ screws‚ or specialized connectors․
Begin by loosely attaching the rails to the posts‚ again prioritizing alignment over immediate tightness – this allows for adjustments later in the process․

Utilize a measuring tape to verify that the frame maintains squareness; diagonal measurements should be equal to ensure a perfectly rectangular structure․
Once satisfied with the alignment‚ progressively tighten the fasteners‚ working your way around the frame to distribute the tension evenly․
Regularly re-check the squareness as you tighten‚ making minor adjustments as needed to maintain the gazebo’s structural integrity and prevent warping․

Roof Frame Installation
Carefully lift and position the pre-assembled roof sections onto the supporting posts‚ aligning them precisely for a secure and weather-resistant overhead structure․
Ensure proper attachment using bolts and screws‚ creating a robust framework for the hardtop roof panels‚ guaranteeing lasting protection․
Pre-Assembly of Roof Sections
Before attempting to mount the roof frame onto the gazebo’s support posts‚ a crucial step involves pre-assembling individual roof sections on a flat‚ protected surface․
This simplifies the overall installation process‚ reducing strain and ensuring accurate alignment during the final attachment phase․
Typically‚ this entails connecting roof beams and supports using provided hardware – bolts‚ screws‚ and connectors – as detailed in the instruction manual․
Pay close attention to the orientation of each component‚ referencing diagrams to guarantee correct assembly and structural integrity․
Thoroughly tighten all fasteners‚ but avoid over-tightening‚ which could damage the aluminum or steel components․
Pre-assembling allows for easier handling of larger sections‚ minimizing the risk of damage or injury during the rooftop installation․
Completing this stage efficiently sets the foundation for a smooth and successful roof frame attachment․
Attaching the Roof Frame to the Support Posts
With the roof sections pre-assembled‚ the next critical phase involves securely attaching the complete roof frame to the gazebo’s upright support posts․
This typically requires lifting the assembled roof structure into position‚ aligning it carefully with the posts‚ and fastening it using appropriate brackets and hardware․
Refer to the instruction manual for specific guidance on bracket placement and fastener types‚ ensuring a robust and stable connection․
Employ assistance during this step‚ as the roof frame can be substantial in weight and size‚ preventing potential accidents or damage․
Ensure each bracket is firmly secured‚ and all bolts are tightened to the manufacturer’s specifications‚ promoting structural soundness․
Double-check alignment to guarantee a level and aesthetically pleasing roofline‚ contributing to the gazebo’s overall appearance․
Proper attachment is paramount for withstanding weather elements and ensuring long-term durability․

Hardtop Roof Panel Installation
Carefully position and secure the hardtop roof panels onto the frame‚ ensuring proper alignment for a weather-resistant and visually appealing gazebo structure․
Positioning and Securing Roof Panels
Begin by carefully lifting each hardtop roof panel into position‚ aligning it with the pre-drilled holes on the roof frame․ Ensure the panels are oriented correctly‚ considering any specific markings or edges indicated in the assembly manual․
Utilizing the provided screws and washers‚ loosely attach each panel to the frame․ Avoid fully tightening the screws at this stage‚ as slight adjustments may be necessary to achieve perfect alignment․ Work systematically‚ moving from one panel to the next‚ gradually building the roof structure․

Double-check the alignment of each panel‚ ensuring it sits flush against the frame and that there are no gaps or overlaps․ Once satisfied with the positioning‚ proceed to tighten all screws securely‚ but avoid over-tightening‚ which could damage the panels or frame․ Consistent tightening is crucial for a stable and weatherproof roof․
Remember to refer to the diagrams in the manual for specific panel placement and screw locations‚ guaranteeing a correct and robust installation․
Ensuring Proper Alignment
Achieving precise alignment is paramount for a structurally sound and visually appealing gazebo․ Begin by visually inspecting the entire roof structure‚ checking for any panels that appear skewed or uneven․ Utilize a level to confirm that the roof surface is consistently horizontal across all sections․
If misalignments are detected‚ gently loosen the screws on the affected panels and make the necessary adjustments․ Small incremental shifts can often correct minor discrepancies․ Pay close attention to the corners and edges‚ as these areas are particularly prone to misalignment․
Re-tighten the screws once the panels are correctly positioned‚ ensuring they are snug but not over-tightened․ Repeat this process for each panel until the entire roof is perfectly aligned․ Consistent checking with a level throughout the process is highly recommended․
Proper alignment not only enhances the gazebo’s aesthetic appeal but also contributes to its long-term stability and resistance to weather elements․

Final Touches and Inspection
Complete the assembly by meticulously tightening all bolts and screws‚ then perform a thorough stability check to guarantee a secure and enjoyable outdoor space․
Tightening All Bolts and Screws
Ensuring the structural integrity of your 10×10 gazebo necessitates a comprehensive tightening of every bolt and screw utilized during assembly․ Begin systematically‚ revisiting each connection point established throughout the preceding steps․ Utilize the appropriate tools – typically a wrench or screwdriver – and apply firm‚ even pressure to achieve a secure fastening․
Avoid over-tightening‚ as this could potentially strip threads or damage the components․ A snug fit is the goal; the connections should be robust but not strained․ Pay particular attention to joints where the support posts meet the side rails and where the roof frame connects to the posts․
Double-check all fasteners‚ especially those exposed to the elements‚ as they may be prone to loosening over time; This meticulous step is crucial for long-term stability and safety‚ guaranteeing your gazebo remains a reliable and enjoyable outdoor feature for years to come․
Overall Stability Check
Following the final tightening of all bolts and screws‚ a thorough overall stability check is paramount to guarantee the safety and longevity of your 10×10 gazebo․ Gently apply pressure to each support post‚ testing for any wobble or movement․ A solid‚ unwavering foundation is essential․
Inspect the roof structure‚ ensuring all panels are securely fastened and aligned․ Look for any signs of stress or strain on the frame․ Walk around the perimeter of the gazebo‚ observing its overall stance and balance․
If any instability is detected‚ re-examine the corresponding connections and tighten them further․ Addressing these issues proactively prevents potential hazards and ensures your gazebo provides a secure and enjoyable outdoor space for relaxation and gatherings for years ahead․
No Responses