
Presto Pressure Canner Manual: A Comprehensive Guide
Understanding the intricacies of your Presto pressure canner is vital for safe food preservation; proper venting, achieving correct pressure, and consistent monitoring are key elements.
Understanding Your Presto Pressure Canner

Your Presto pressure canner is a robust appliance designed for safely preserving low-acid foods like vegetables, meats, and poultry. It operates by creating a high-temperature environment – 240°F (116°C) – achieved through pressurized steam, effectively eliminating harmful bacteria like Clostridium botulinum, which causes botulism.
Unlike water bath canning, which is suitable only for high-acid foods, pressure canning is essential for low-acid items. The canner’s sealed environment and precise pressure control are crucial for successful preservation. Venting, a critical step, replaces air within the canner with steam, ensuring the correct temperature is reached and maintained.
Remember, consistent adherence to recommended processing times and pressures, adjusted for your altitude, is paramount for food safety. Familiarize yourself with all components and safety features before beginning.
Canner Components and Identification
A Presto pressure canner consists of several key components working in harmony. The main body, typically made of aluminum, houses the canning process. The lid features a sealing ring (gasket) ensuring a tight closure during pressurization. Pressure regulators – weights or dial gauges – maintain the desired internal pressure.
The vent pipe, often called the petcock, is crucial for initial venting, releasing air before pressure builds. A safety valve prevents excessive pressure buildup. The pressure indicator rises to show pressure is present, but doesn’t quantify it. The rack inside supports jars, preventing direct contact with the canner’s bottom.
Understanding each part’s function is vital. Regularly inspect the gasket for cracks or damage, and ensure the vent pipe and safety valve are clear. Proper identification aids in maintenance and troubleshooting.
Safety Precautions Before You Begin

Prioritizing safety is paramount when using a Presto pressure canner. Always read your manual thoroughly before each use, understanding all instructions and warnings. Inspect the canner for any damage – dents, cracks, or a warped lid – and do not use if compromised. Ensure the vent pipe (petcock) is clear of obstructions.
Never attempt to open the canner while pressure remains inside; allow for natural cooling or follow quick-cooling instructions carefully. Keep children and pets away from the canning area during operation. Use only jars specifically designed for canning, and inspect them for chips or cracks.
Proper ventilation is essential; operate the canner in a well-ventilated kitchen. Be mindful of hot steam released during venting and cooling. Following these precautions ensures a safe and successful canning experience.

Preparing Jars and Lids
Thorough jar and lid preparation is crucial for successful sealing. Before use, carefully inspect all canning jars for any nicks, cracks, or chips, especially around the rim. Wash jars in hot, soapy water, rinsing completely, or run them through a dishwasher cycle. Keep jars hot until ready to fill; this prevents thermal shock.
Modern lids require minimal preparation. Inspect the sealing compound for defects. Do not boil lids with sealing compound as older instructions suggested; simply wash them in warm, soapy water. Ensure the sealing compound is pliable and intact.
Properly prepared jars and lids are essential for creating a vacuum seal, preventing spoilage, and ensuring food safety. Following these steps maximizes your canning success.
Jar Preparation Methods
Maintaining hot jars throughout the canning process is paramount for safe and effective preservation. Several methods achieve this. The most common is washing jars in hot, soapy water and keeping them in the hot water until filling. Alternatively, run jars through a dishwasher cycle, leaving them inside until needed.
Sterilization is not generally required for most high-acid foods processed for 10 minutes or more. However, for low-acid foods or processing times under 10 minutes, sterilize jars by boiling them for 10 minutes at altitudes below 1,000 feet, adding one minute for each additional 1,000 feet.
Regardless of the method, ensure jars are free of cracks or chips and remain hot until filled to prevent breakage and ensure proper sealing.
Lid Preparation and Sealing Compounds
Modern canning lids require specific preparation for a successful seal. Unlike older methods, pre-heating lids is no longer universally recommended by manufacturers. However, warming the lids in hot (not boiling) water softens the sealing compound, improving its ability to conform to the jar rim.
Inspect lids for any damage, such as dents or rust, and discard any that are compromised. Use only new lids for each canning batch, as the sealing compound is designed for one-time use. Ensure the sealing compound remains flat against the jar rim during processing.
Properly tightened bands are crucial, but avoid over-tightening, which can cause buckling or prevent proper sealing.
Food Preparation for Canning
Thorough food preparation is paramount for safe and high-quality canned goods. Begin by selecting fresh, high-quality produce, free from blemishes or spoilage. Wash all fruits and vegetables meticulously to remove any dirt or debris. Peeling, pitting, and chopping are often necessary, depending on the recipe.
Understanding the difference between low-acid and high-acid foods is critical, as it dictates the appropriate canning method. Low-acid foods (meats, vegetables) require pressure canning to reach temperatures high enough to destroy botulism spores. High-acid foods (fruits, pickles) can be safely processed using a boiling water bath.
Proper packing – raw pack or hot pack – impacts processing times and final product quality.
Low-Acid vs. High-Acid Foods
Distinguishing between low-acid and high-acid foods is fundamental to safe canning practices. Foods with a pH of 4.6 or lower are considered high-acid, including most fruits, jams, jellies, and pickles. These can be safely processed in a boiling water bath canner, as the acidity inhibits the growth of Clostridium botulinum.
Conversely, low-acid foods – vegetables, meats, poultry, and seafood – have a pH above 4.6. These require pressure canning to reach temperatures of 240°F (116°C) to destroy botulism spores, which can survive boiling water temperatures.

Always consult tested recipes to determine the correct processing method for each food. Mixing high- and low-acid foods can alter the pH and compromise safety.
Proper Food Packing Techniques (Raw Pack vs. Hot Pack)
Choosing between raw pack and hot pack methods impacts processing times and jar contents. Raw packing involves filling jars with fresh, unheated food. This method often results in more shrinkage during processing, potentially leading to liquid loss and seal failures. It requires longer processing times as the food heats up within the jar.
Hot packing, conversely, involves heating food to a boil before packing it into jars. This reduces shrinkage, expels air, and improves color retention. Hot-packed foods generally require shorter processing times.
Always follow recipe instructions regarding packing methods. Proper packing ensures adequate heat penetration and a successful seal. Headspace requirements also vary depending on the chosen technique.
The Canning Process: Step-by-Step
Begin by ensuring your Presto canner has the correct amount of water – typically 2-3 inches. Carefully load prepared jars into the canner using a jar lifter, avoiding direct contact. Secure the lid, ensuring proper alignment, and lock it into place.
Next, initiate the venting process, allowing steam to escape steadily for the specified duration (usually 10 minutes). Monitor the steam’s consistency. Once venting is complete, attach the weight or close the vent according to your model’s instructions.
Allow the canner to pressurize to the required level for your altitude and food type. Begin timing the processing period only when the correct pressure is reached and maintained consistently.
Adding Water to the Canner
The amount of water added to your Presto pressure canner is crucial for successful and safe canning. Generally, 2 to 3 inches of water are required in the canner base. This level ensures sufficient steam generation for proper pressurization without risking water entering the jars during processing.
Always refer to your specific canner’s manual for precise water level recommendations, as models may vary. Use hot water to minimize the time it takes to reach pressure.
Be mindful of water loss during venting; successive batches may require topping off. It’s important to avoid overfilling, as excessive water can also impact processing. Maintaining the correct water level is a fundamental step in the canning process.
Loading Jars into the Canner
Carefully loading jars into the Presto pressure canner is essential for even heat distribution and safe processing. Place jars onto the canner rack, ensuring they don’t touch each other or the sides of the canner. This allows steam to circulate freely around each jar.
The rack prevents jars from direct contact with the hot canner base, reducing the risk of breakage. Jars should be upright and stable.
Secure the lid tightly, following the manufacturer’s instructions. Double-check the sealing ring is properly positioned. Proper loading ensures consistent processing and optimal preservation of your food. Avoid overcrowding the canner; follow recommended jar capacities for your model.
Venting the Pressure Canner
Venting the Presto pressure canner is a crucial step to remove air and ensure accurate pressure build-up for safe canning. Begin venting after the lid is securely locked in place and before applying heat. Allow a steady, vigorous stream of steam to escape from the vent pipe for the recommended duration – typically 10 minutes, though experienced canners may adjust slightly.
This process replaces air with steam, vital for achieving the correct processing temperature. The venting time isn’t precise; a couple of minutes’ variation isn’t critical. Don’t start your timer until a consistent steam flow is established, but don’t wait for the pressure indicator to rise.
Venting Duration and Indicators
The standard venting duration for a Presto pressure canner is 10 minutes, a time established by the USDA for safety, regardless of canner size or load. However, experienced canners sometimes vent for shorter periods, like 5 minutes, based on long-held practice. It’s important to understand that venting duration isn’t an exact science; slight variations are generally acceptable.
The pressure indicator rising during venting simply signifies that pressure is building within the canner, not the amount of pressure. It confirms the system is functioning correctly and serves as a warning – never open the lid while the indicator is up. Don’t rely on the indicator to start your processing timer; begin timing after the consistent steam flow is achieved during venting.
The 10-Minute Venting Rule Explained
The universally recommended 10-minute venting period isn’t about achieving a specific steam intensity, but rather ensuring all air inside the canner is fully replaced with steam. This air displacement is crucial for accurate temperature control during processing; While a strong, steady steam flow is observed, the timer should begin regardless of steam strength.
Deviations from the 10-minute rule are common, with some experienced canners opting for 5 minutes based on tradition. However, exceeding the venting time significantly – for example, 20 minutes – could lead to excessive water loss, potentially impacting processing safety. Always check water levels before successive batches, as water escapes solely during venting. Remember, precision isn’t paramount; a few minutes’ variance is generally acceptable.
Understanding the Pressure Indicator
The pressure indicator on your Presto canner doesn’t signify the amount of pressure inside, but rather confirms that some pressure is present. Its rise during venting indicates the system is functioning correctly, and serves as a critical warning – never attempt to open the lid while the indicator is up!
Canner manuals generally don’t instruct users to wait for the indicator to rise before starting the processing timer. This is because the indicator’s movement is a consequence of steam building, not a benchmark for readiness. Understanding that venting’s purpose is to displace air with steam clarifies why the indicator often rises mid-vent. It’s a confirmation of operation, not a precise measurement of pressure achieved.
Adjusting Venting Time Based on Altitude
While the standard 10-minute venting time is a USDA-recommended safety measure, altitude adjustments primarily affect the processing time, not the venting duration. The initial venting phase focuses on expelling air and establishing a consistent steam environment within the canner, a process relatively unaffected by elevation.
However, be mindful of potential water loss during extended venting, especially at higher altitudes where boiling points are lower. Successive batches may require water level checks, as prolonged venting can lead to excessive evaporation. Although a couple of minutes’ variance in venting isn’t critical, consistently over-venting could compromise the liquid volume needed for safe processing.
Pressurizing and Processing
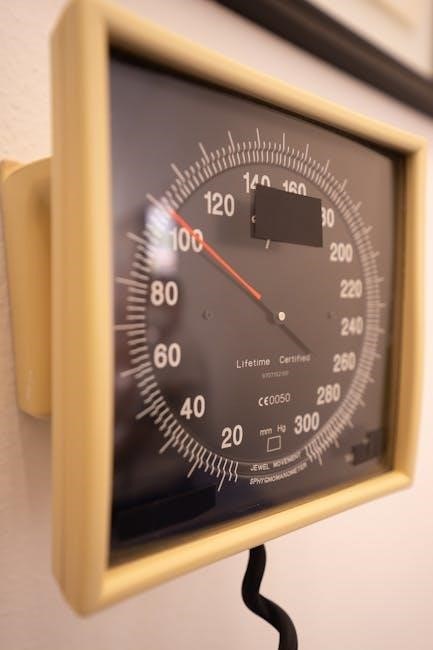
Once venting is complete, secure the lid tightly and allow the pressure to build to the level specified in your recipe, adjusted for your altitude. The pressure indicator will rise, signifying pressure within the canner, but doesn’t immediately reflect the amount of pressure achieved – it simply confirms the system is working.
Begin timing the processing period only when the correct pressure is reached and maintained. Consistent pressure is crucial; fluctuations can compromise the seal and safety of your canned goods. Monitor the pressure gauge frequently, adjusting the heat source as needed to maintain a steady reading throughout the entire processing time.
Achieving the Correct Pressure
Determining the correct pressure for your altitude is paramount for safe canning. Recipes specify pressure based on sea level; higher altitudes require increased pressure to reach the necessary temperature for effective sterilization. Consult a reliable altitude adjustment chart – often found within your Presto manual or USDA guidelines – to determine the appropriate pressure for your location.
Carefully monitor the pressure gauge throughout the pressurization process. Avoid rapid pressure increases, as this can cause food to boil over and affect the seal. Once the desired pressure is reached, adjust the burner to maintain a consistent reading, making small adjustments as needed. Remember, the goal is steady, sustained pressure for the duration of the processing time.
Processing Times for Different Foods
Accurate processing times are crucial and vary significantly based on the food being canned and its acidity level. Low-acid foods, like vegetables and meats, require longer processing times at higher pressures to eliminate the risk of botulism. High-acid foods, such as fruits and pickles, need less time due to their natural acidity.
Always refer to tested recipes from reputable sources like the USDA Complete Guide to Home Canning or Ball Blue Book. These resources provide precise processing times tailored to specific foods, jar sizes, and altitudes. Deviating from recommended times can compromise food safety. Note that processing time begins after the canner reaches the correct pressure.
Maintaining Consistent Pressure
Consistent pressure throughout the processing time is paramount for safe canning. Fluctuations can lead to under-processing, risking spoilage, or over-processing, affecting food texture. Monitor the pressure gauge closely, making small adjustments to the burner heat as needed to maintain the recommended pressure for your altitude and recipe.
If the pressure drops below the recommended level at any point, you must bring the canner back up to pressure and restart the processing time from the beginning; This ensures adequate heat penetration to destroy harmful microorganisms. Avoid large adjustments to the heat source; small, incremental changes are best for stability.
Cooling and Finishing
Allowing the pressure canner to cool down properly is a critical step in the canning process. There are two primary cooling methods: natural cooling and quick cooling. Natural cooling involves letting the canner depressurize on its own, which takes longer but is generally recommended for optimal seal formation.
Quick cooling, while faster, can sometimes lead to siphoning (liquid loss from jars) and seal failures. Never attempt to speed up cooling by running cold water over the canner; this can cause jars to break or contents to spoil. Once the pressure gauge reaches zero, wait an additional 10 minutes before carefully opening the lid, tilting it away from you to avoid steam burns.
Natural Cooling vs. Quick Cooling
The cooling phase significantly impacts canning success, presenting two distinct methods: natural cooling and quick cooling. Natural cooling allows the canner to depressurize gradually, typically taking 30-60 minutes, minimizing jar disturbance and promoting better seals. This method is generally preferred for consistent results.
Quick cooling, achieved by running cold water over the canner lid (not the body!), drastically reduces cooling time but carries risks. It can cause sudden pressure changes, leading to siphoning – liquid expulsion from jars – and potentially compromised seals. While faster, quick cooling isn’t advised unless specifically indicated by a tested recipe, as it may affect food quality and safety.
Checking Jar Seals
After cooling completely, verifying jar seals is crucial to ensure food safety and prevent spoilage. Begin by checking the lid’s concave shape; a properly sealed jar will exhibit a downward curve; Gently press the center of the lid – it shouldn’t flex or pop up and down. Listen for a distinct “ping” sound when pressed, indicating a good seal.
Remove the bands and attempt to lift the jar by the lid. If the lid holds firmly, the jar is sealed. If the lid lifts, the jar didn’t seal and should be refrigerated immediately and consumed quickly, or reprocessed with a new lid. Don’t rely solely on visual inspection; always perform the physical tests for reliable confirmation of a secure seal.
Troubleshooting Seal Failures
Seal failures in pressure canning can occur for several reasons, but are often easily remedied. Common causes include chipped jar rims, improper lid application, insufficient headspace, or food residue obstructing the sealing surface. Always inspect jars for chips or cracks before use, and ensure lids are correctly centered on the jar rim.
If a jar fails to seal, it must be refrigerated and used promptly, or reprocessed within 24 hours using a new lid. Reprocessing is best done within this timeframe to maintain food quality. Avoid reusing lids, as the sealing compound is designed for one-time use. Addressing these potential issues proactively minimizes seal failures and ensures safe, preserved food.
Common Canning Problems and Solutions
Several issues can arise during pressure canning, but most have straightforward solutions. Siphoning, where liquid escapes from jars, is often caused by overfilling, improper jar packing, or rapid temperature changes. Ensure adequate headspace and pack jars consistently. Under-processing can lead to spoilage; always adhere to recommended processing times based on food type and altitude.
Over-processing, while less common, can affect food texture and flavor. If the pressure drops significantly during processing, restore it to the correct level before resuming the timer. Regularly inspect gaskets and seals for wear and tear. Maintaining consistent pressure and following guidelines diligently minimizes problems and guarantees safe, high-quality canned goods.
Under-Processing Issues
Under-processing represents a significant safety risk in pressure canning, potentially leading to the growth of Clostridium botulinum, the bacteria responsible for botulism. This occurs when food isn’t heated to a sufficient temperature for a long enough duration to destroy spores. Symptoms of botulism are severe and potentially fatal, making adherence to processing times crucial.
Common causes include inaccurate timing, insufficient pressure, or altitude adjustments not being made. If you suspect under-processing – perhaps the pressure dropped below the recommended level during canning – the safest course of action is to discard the food. Do not taste or attempt to reprocess; it’s better to be safe than sorry. Always double-check your manual and follow USDA guidelines.
Over-Processing Issues
While generally safer than under-processing, over-processing can still negatively impact the quality of your canned goods. Extended heat exposure can lead to undesirable changes in texture, color, and flavor, particularly in delicate fruits and vegetables. Foods may become mushy, discolored, or develop a “cooked” taste.
Over-processing isn’t typically a safety concern if the canner maintained adequate pressure throughout the process. However, excessive processing can deplete nutrients and cause food to float in the jar due to cell structure breakdown. It’s important to adhere to recommended processing times and avoid extending them unnecessarily. Monitoring the pressure gauge and following the manual’s instructions are key to preventing this issue.
Dealing with Siphoning
Siphoning, the loss of liquid from jars during processing, is a common canning issue, but usually doesn’t compromise safety if a proper vacuum seal forms. It appears as liquid bubbling out of the jar during venting or processing. Several factors can contribute to siphoning, including overfilling jars, using jars with chipped rims, or insufficient headspace.
To minimize siphoning, ensure accurate headspace measurements and use jars in perfect condition. Gently remove any food particles from the jar rim before applying the lid. While a small amount of siphoning isn’t critical, excessive loss can affect the liquid level and potentially lead to food exposure. If siphoning occurs, proceed with processing, but check seals carefully after cooling.

Presto Canner Maintenance and Care
Regular maintenance ensures your Presto canner operates safely and efficiently for years. After each use, thoroughly clean the canner, including the pot, rack, and lid, with warm, soapy water. Inspect the gasket for cracks, hardening, or deformation; replace it annually or as needed to maintain a proper seal.
Pay close attention to the vent pipe and pressure regulator; ensure they are clear of obstructions. Store the canner in a dry place, with the lid upside down to allow for ventilation. Periodically inspect all parts for wear and tear, and replace any damaged components promptly. Following these simple steps will prolong the life of your canner.
Cleaning and Storage
Proper cleaning and storage are crucial for maintaining your Presto canner’s longevity and hygiene. After each canning session, wash the pot, rack, and lid with warm, soapy water. Avoid abrasive cleaners that could damage the surfaces. Inspect the gasket carefully for any signs of wear, and hand wash it separately.
For storage, ensure all parts are completely dry. Store the canner in a dry location, preferably with the lid inverted to allow air circulation. This prevents moisture buildup and potential mildew growth. Consider storing the gasket inside the canner to protect it. Regular cleaning and careful storage will keep your canner ready for its next use.
Inspecting Gaskets and Seals
Regularly inspecting the gaskets and seals of your Presto canner is paramount for safe and effective operation. Before each use, carefully examine the gasket for cracks, hardening, or any signs of deterioration. A damaged gasket will not create a proper seal, leading to potential processing failures and food spoilage.
Pay close attention to the sealing ring’s flexibility; it should be pliable and not brittle. Also, inspect the vent pipe and overpressure plug for any obstructions. Replace the gasket annually, or more frequently if damage is detected. Maintaining these seals ensures consistent pressure and prevents dangerous steam leaks during the canning process, safeguarding both your food and yourself.
Replacing Parts When Necessary
Maintaining your Presto pressure canner involves timely replacement of worn or damaged parts to ensure continued safety and optimal performance. Gaskets, sealing rings, and the overpressure plug are considered wear items and should be replaced annually, or immediately if any damage is observed.
Do not attempt to repair damaged components; always use genuine Presto replacement parts to guarantee compatibility and maintain the canner’s safety features. The vent pipe and pressure regulator should also be inspected regularly and replaced if clogged or malfunctioning. Ignoring necessary replacements can compromise the canner’s ability to maintain proper pressure, potentially leading to under-processing and food spoilage. Prioritize safety by keeping your canner in peak condition.
No Responses